Story
Greeting everyone and welcome back.
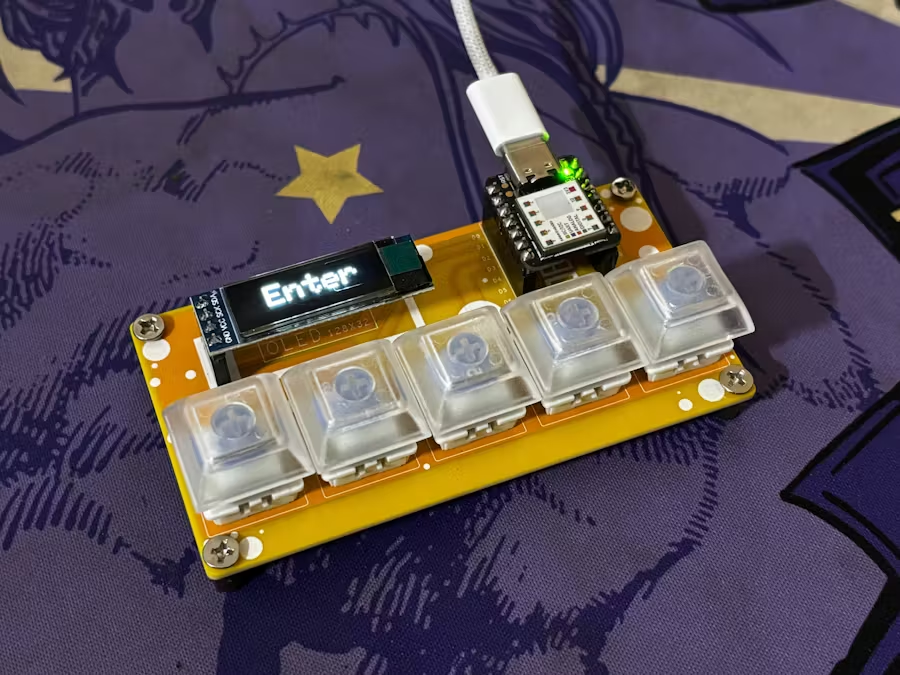
This is Paste Pal 2, which is a follow-up to my previous Paste Pal project, which was essentially a two-button macropad setup with an SSD1306 OLED screen, with one button for copy and the other for paste. The new version includes five mechanical switches that can be used to do XYZ things such as open an app, execute a command, type a special word, and so on.
Right now, we use the five buttons to perform the following commands: enter, scroll up, scroll down, copy, and paste. However, it is simple to change this order and replace it with a new command in the main code.
The heart of our device is the XIAO SAMD21 Microcontroller from Seeed Studio, a dev board based on the SAMD21G18 and including HID capabilities. This means that the controller registers as a human interface device and can be configured to resemble a keyboard, mouse, or, in our instance, a macropad.
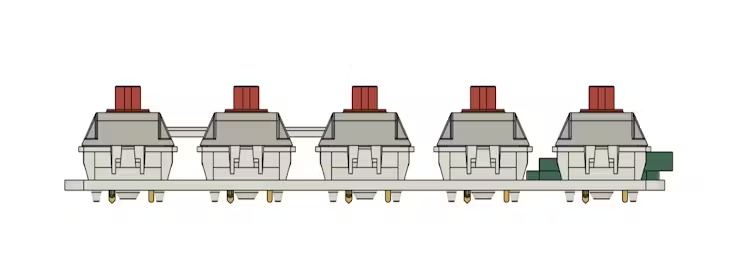
In Version 1 of this project, we have utilized SMD Tacktile buttons, which were good to work with but gave no touch resistance or sensation so in Version 2, we swapped them with Blue Mechanical keys, which create a fantastic touch feel and provide a clicky sound, which makes the setup more engaging.
This macropad allows us to copy and paste anything, scroll up and down a webpage, and even utilize the enter command, with the selected command being shown on the OLED screen.
This article is about the full build of the Paste Pal 2 so let's get started with the build.
Materials Required
These were the materials used in this project.
- Custom PCBs provided by Seeed Studio Fusion
- XIAO SAMD21 Microcontroller
- Blue Mechanical Switches
- Keycaps
- SSD1306 OLED 128x32
- female header pins (for XIAO and OLED Header)
- M2.5 bolts
- M2.5 PCB Standoffs.
Design
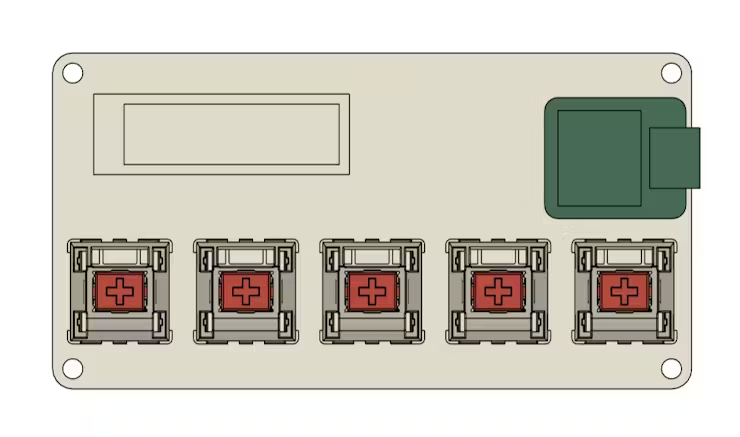
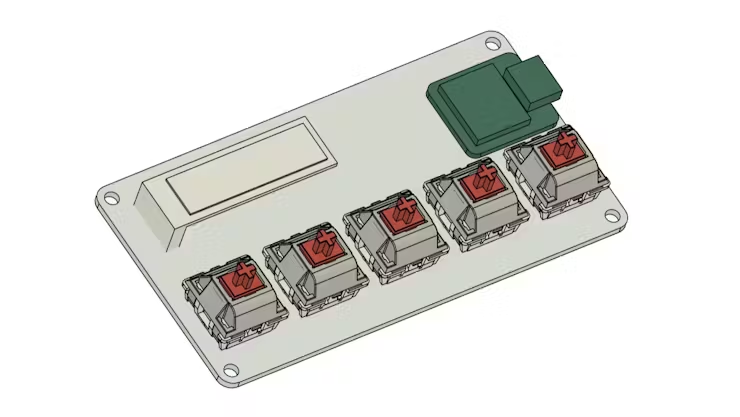
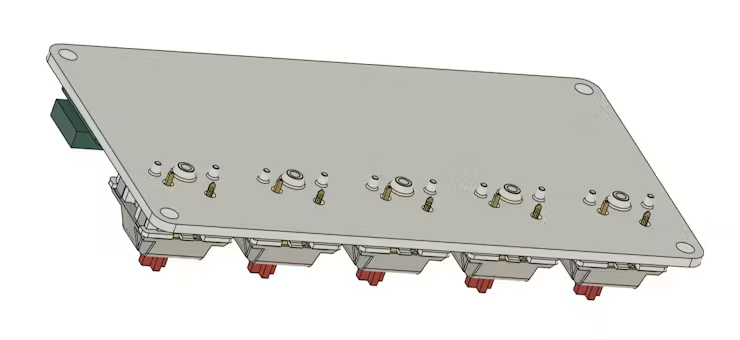
In order to begin the project, we first prepare the 3D model in Fusion360 by importing the models for the SSD1306 OLED screen, XIAO microcontroller, and mechanical switch into the design. Next, we create a base board by putting all the parts in the proper sequence.
The OLED screen is placed in the upper left corner, and XIAO is placed in the upper right corner. All mechanical keys are arranged in a line on the bottom side of the board.
To provide this board four legs to rest on, we also created four 3mm holes close to each corner so that PCB standoffs could be added later.
PCB Design
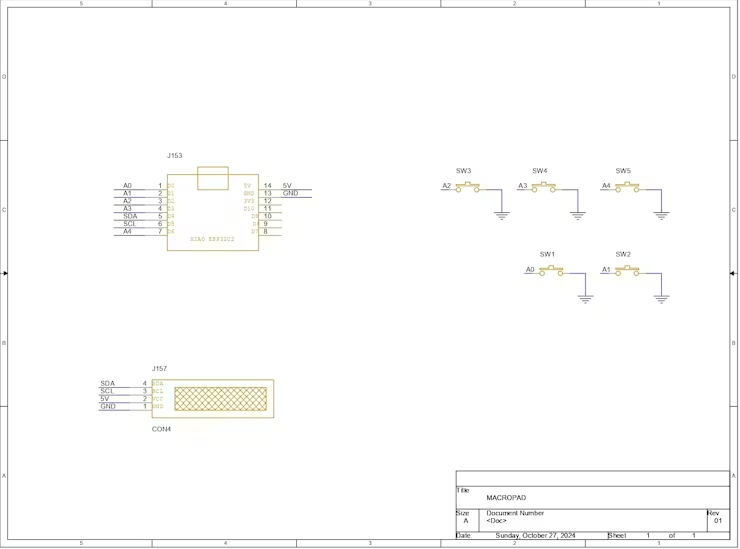
Following the conclusion of the 3D model, we began working on the schematic of this project, which consists of five mechanical switches connected to an XIAO and an OLED screen.
- All five mechanical switches's NO is connected to GND, and NC is connected to D0, D1, D2, D3, and D6.
- The SDA of the OLED is connected with XIAO's D4 pin and the SCL is connected to D5.
- OLED's VCC is connected to 5V of XIAO and GND is connected to GND.
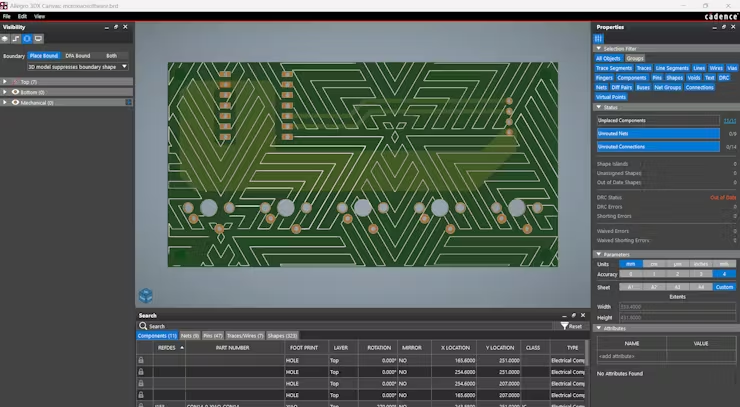
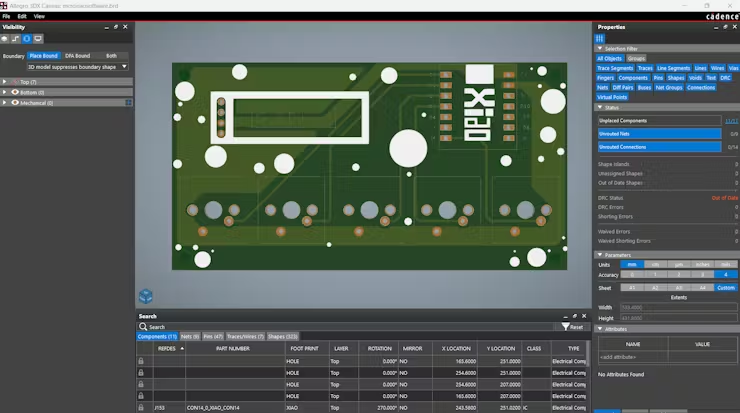
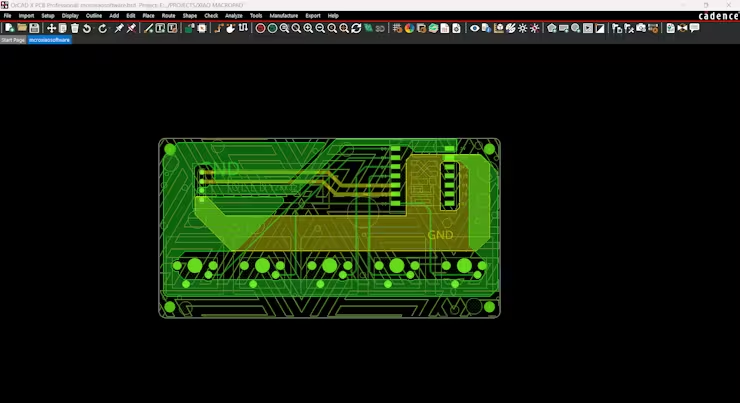
The outline, along with the location of each switch, the OLED screen, and the XIAO, were derived from the 3D model, and then each component was placed in its proper position. We even added four 3mm holes at each corner, which we would later utilize to add PCB standoffs.
Seeed Studio Fusion
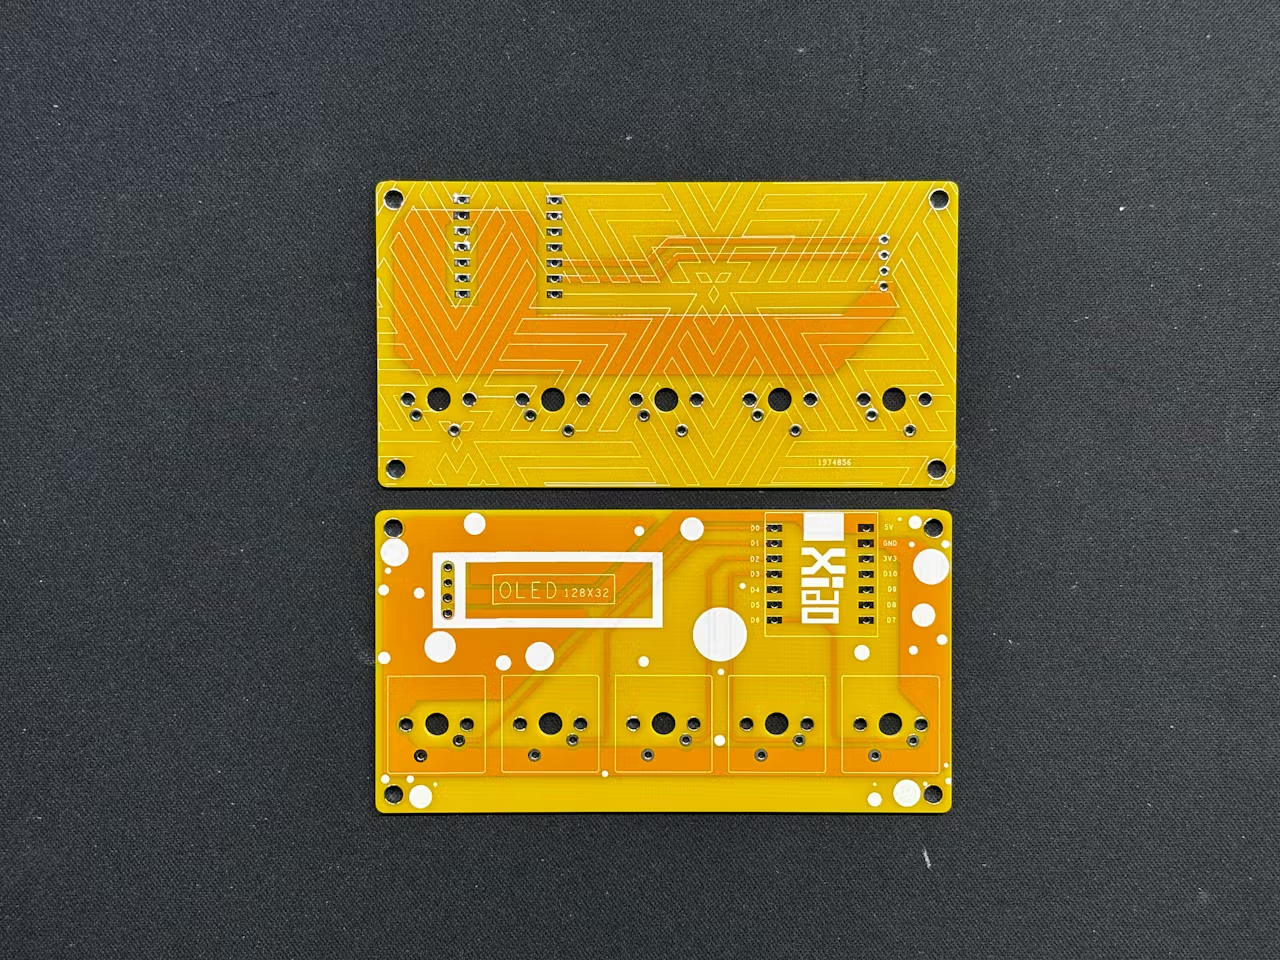
Following the completion of the Gerber data, we uploaded the file to Seeed Fusion's website and placed an order for a yellow Solder mask with white silkscreen.
PCBs were received in a week, and their quality was super good considering the rate, which was also pretty low.
Seeed Fusion PCBService offers one-stop prototyping for PCB manufacture and PCB assembly, and as a result, they produce superior-quality PCBs and fast turnkey PCBAs within 7 working days.
Seeed Studio Fusion PCB Assembly Servicetakes care of the entire fabrication process, from Seeed Studio FusionAgile manufacturing and hardware customization to parts sourcing, assembly, and testing services, so you can be sure that they are getting a quality product.
After gauging market interest and verifying a working prototype, Seeed Propagate Service can help you bring the product to market with professional guidance and a strong network of connections.
PCB Assembly Process
- This board's construction is really simple; we insert all of the mechanical switches in their proper locations, including the female header pins for the XIAO and OLED screens.
- Flipping the board around allows us to solder all of the mechanical switch and header pins.
- The XIAO M0 then gets placed alongside the OLED screen.
Final Assembly
- We tighten four PCB standoffs to four mounting holes on the board with four M2.5 bolts and a screwdriver.
- We then attached keycaps to all five mechanical switches to complete the assembly process.
CODE
Here's the sketch that we used in this project and its a simple one.
#include <Wire.h>
#include <Adafruit_GFX.h>
#include <Adafruit_SSD1306.h>
#include <Keyboard.h>
#define SCREEN_WIDTH 128
#define SCREEN_HEIGHT 32
#define OLED_RESET    -1
Adafruit_SSD1306 display(SCREEN_WIDTH, SCREEN_HEIGHT, &Wire, OLED_RESET);
const int buttonCopyPin = 0; // Pin for the copy button
const int buttonPastePin = 1; // Pin for the paste button
const int buttonScrollUpPin = 2; // Pin for the page scroll up button
const int buttonScrollDownPin = 3; // Pin for the page scroll down button
const int buttonEnterPin = 6; // Pin for the enter button
void setup() {
// Initialize the OLED display
if(!display.begin(SSD1306_SWITCHCAPVCC, 0x3C)) {
Serial.println(F("SSD1306 allocation failed"));
for(;;);
}
display.display();
delay(2000);
display.clearDisplay();
// Initialize the buttons
pinMode(buttonCopyPin, INPUT_PULLUP);
pinMode(buttonPastePin, INPUT_PULLUP);
pinMode(buttonScrollUpPin, INPUT_PULLUP);
pinMode(buttonScrollDownPin, INPUT_PULLUP);
pinMode(buttonEnterPin, INPUT_PULLUP);
// Initialize the Keyboard library
Keyboard.begin();
}
void loop() {
if (digitalRead(buttonCopyPin) == LOW) {
display.clearDisplay();
display.setTextSize(3);
display.setTextColor(SSD1306_WHITE);
display.setCursor(20, 5);
display.print("Copy");
display.display();
Keyboard.press(KEY_LEFT_CTRL);
Keyboard.press('c');
delay(100);
Keyboard.releaseAll();
delay(500); // Debounce delay
}
if (digitalRead(buttonPastePin) == LOW) {
display.clearDisplay();
display.setTextSize(3);
display.setTextColor(SSD1306_WHITE);
display.setCursor(20, 5);
display.print("Paste");
display.display();
Keyboard.press(KEY_LEFT_CTRL);
Keyboard.press('v');
delay(100);
Keyboard.releaseAll();
delay(500); // Debounce delay
}
if (digitalRead(buttonScrollUpPin) == LOW) {
display.clearDisplay();
display.setTextSize(2);
display.setTextColor(SSD1306_WHITE);
display.setCursor(10, 5);
display.print("Scroll UP");
display.display();
Keyboard.press(KEY_PAGE_UP);
delay(100);
Keyboard.releaseAll();
delay(500); // Debounce delay
}
if (digitalRead(buttonScrollDownPin) == LOW) {
display.clearDisplay();
display.setTextSize(2);
display.setTextColor(SSD1306_WHITE);
display.setCursor(10, 5); // Adjusted cursor position
display.print("Scroll Down");
display.display();
Keyboard.press(KEY_PAGE_DOWN);
delay(100);
Keyboard.releaseAll();
delay(500); // Debounce delay
}
if (digitalRead(buttonEnterPin) == LOW) {
display.clearDisplay();
display.setTextSize(3);
display.setTextColor(SSD1306_WHITE);
display.setCursor(25, 5);
display.print("Enter");
display.display();
Keyboard.press(KEY_RETURN);
delay(100);
Keyboard.releaseAll();
delay(500); // Debounce delay
}
}
In this sketch, we are using two main libraries: one for running the OLED screen and the other to execute keyboard functions.
#include <Wire.h>
#include <Adafruit_GFX.h>
#include <Adafruit_SSD1306.h>
#include <Keyboard.h>
Make sure to download and install these above libraries before using this sketch.
This sketch makes our XIAO act like a keyboard when specific buttons are pressed, giving feedback on an OLED display. Each button press simulates a keyboard shortcut or key press, and the OLED display updates to reflect the action.
RESULT
The end result of this small build is a working Macropad that can execute the Copy paste command, scroll a webpage (any app that supports Page up and down), and enter commands.
We can use Copy and Paste macros for typing and even cad work.
The scrolling feature is especially useful while browsing YouTube or other websites that demand frequent scrolling.
Overall, this project has reached its peak and requires no additional revisions, thanks to the excellent XIAO and Seeed Studio Fusion Service.
Leave a comment if you need any help regarding this project. This is it for today, folks.
You guys can check them out if you need great PCB and stencil service for less cost and great quality.
And I'll be back with a new project pretty soon!