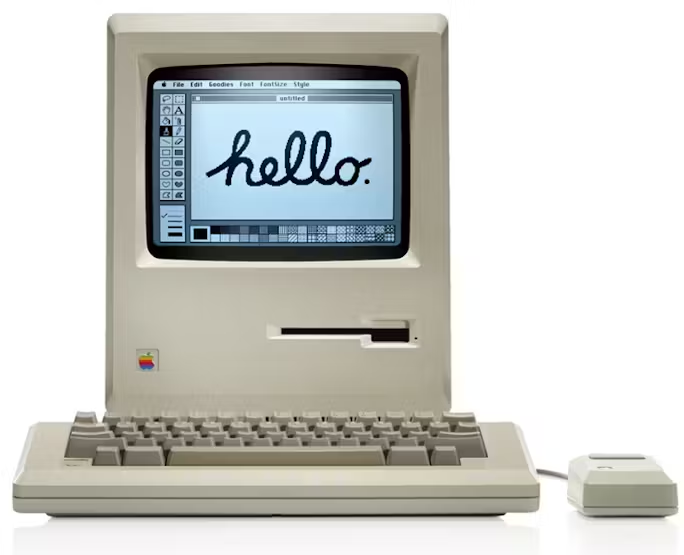
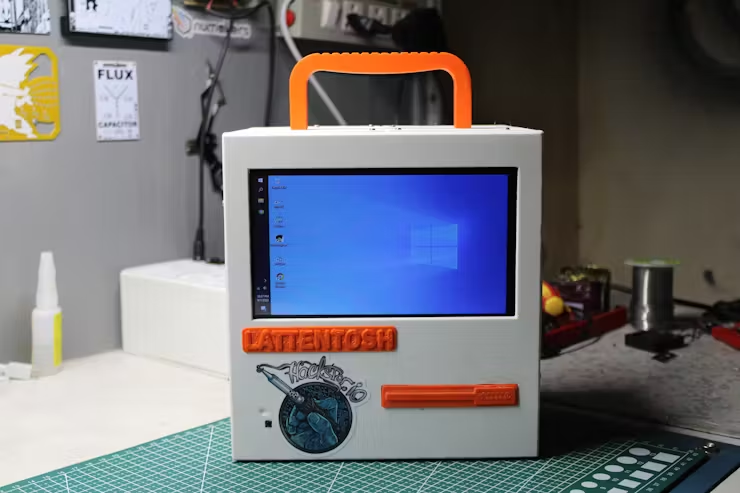


So here’s something super cool, a full-size Macintosh 128K-inspired PC completely 3D Printed and made from Scratch.


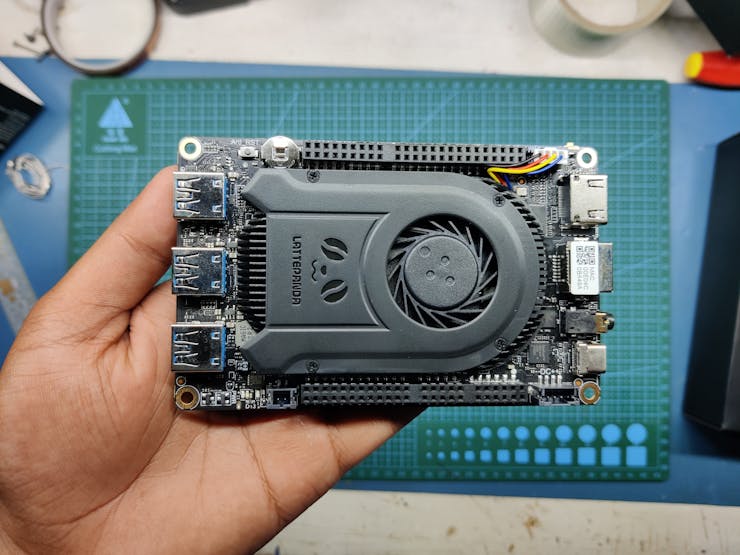
The heart and brain of this project is a Latte Panda 3 Delta which is a Single Board computer powered by an Intel N5105 11th Gen Mobile Processor, it has 8GB LDDR4 Memory with 64GB eMMC onboard.
Display & Hardware Integration
For the display, I repurposed a 7-inch HD screen from an earlier handheld gaming console project. While that earlier build functioned well, it was held back by the limitations of a Raspberry Pi 3B+, which had just 1GB of RAM and lacked the performance I was aiming for.
This new setup, by contrast, delivers a much more powerful experience thanks to the LattePanda 3 Delta. It offers vastly superior processing capabilities, increased RAM, expanded storage, and all-around better performance.
Designing the Enclosure
Inspired by the classic design of the original Macintosh 128K from the 1980s, I set out to recreate a retro-style enclosure. Using Fusion360, I designed the entire model from scratch, taking cues from the iconic look of that era. Once the design was complete, I exported the parts and fired up my reliable Ender 3 3D printer. I printed all components using white and orange PLA filament, giving the build a modern retro aesthetic.
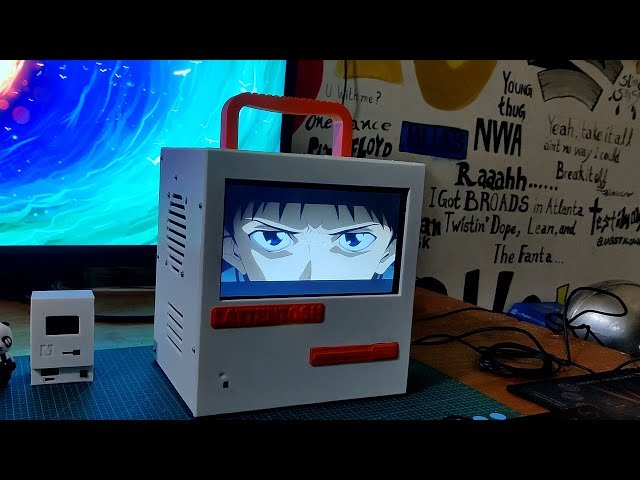
And just in case you’re wondering—yes, it runs DOOM!
This article covers the complete process of building this unique LATTEintosh PC—from concept to final assembly. Let’s get into it!
Materials & Components Used
Here’s a list of everything that went into this project:
LattePanda 3 Delta SBC
7-Inch HDMI-Compatible Display
4-Ohm Speaker
12V DC Cooling Fan
Tactile Switch
Mini HDMI Cable
3D Printed Parts
M2 Screws
M3 Screws
The Story Behind the Project: Why Recreate a Macintosh 128K?


This project was born out of nostalgia and a deep appreciation for classic computer design. Growing up in India, I was first introduced to computers in the late ’90s. My father had picked up a second-hand Macintosh 128K, which he used mainly for document preparation. I, however, mostly used it to play games.
Later, I got my first personal computer—a Compaq desktop running Windows 98. That jump from a black-and-white interface to full color felt like stepping into the future. The new machine was clearly more advanced, but the Macintosh still held a special place in my heart for its clean, all-in-one aesthetic.
The idea behind this build was to bring that same retro charm into the modern era. Using Fusion360, I modeled my own tribute to the Macintosh 128K with updated internals and hardware.
I reused a 7-inch display from an old project and built the enclosure around it. Given the size and complexity, I divided the model into three main parts:
Front Cover – houses the display
Middle Section – contains the LattePanda SBC
Bottom Lid – holds the cooling fan
This modular design made it easier to print and assemble, while also maintaining the original charm and form factor of the retro inspiration.
LattePanda 3 Delta

For this build, I’m leveraging the capabilities of the LattePanda 3 Delta to power my custom LATTEintosh PC.
The LattePanda 3 Delta is a modern single-board computer (SBC) developed by LattePanda, featuring an Intel Celeron N5105—a quad-core processor from Intel’s 11th generation lineup, optimized for mobile performance.
This board is equipped with 8GB of LPDDR4 RAM running at 2933MHz and offers 64GB of onboard eMMC storage, which is more than sufficient for lightweight to moderately heavy tasks.
While it comes pre-installed with Windows 10, it also supports Linux, which is a fantastic option for those looking for more customization or lightweight OS performance.
Unlike some earlier versions, the LattePanda 3 Delta uses an M.2 B Key slot instead of the E Key, enabling connectivity with 4G or 5G modules. It even supports the addition of a dedicated graphics card through an NVMe Key M to PCI-E x16 Riser Adapter, which really opens the door for more intensive graphical applications.
One of its standout features is the integrated Atmega32u4 microcontroller (MCU), allowing for onboard microcontroller functionality. Plus, there’s an onboard amplifier for speaker connections, and it supports PD (Power Delivery), offering 5V and 12V outputs to power external modules and peripherals.
A versatile USB Type-C port on the board supports multiple functions—it can act as a power input, a standard USB interface, a display output, or even serve as a connection hub using a multiport adapter for expanded functionality.
Specifications Overview:


CPU: Intel® Celeron® N5105
Cores/Threads: Quad-Core, Four-Thread (2.0 – 2.9GHz)
Graphics: Intel® UHD Graphics (450–800MHz)
Memory: 8GB LPDDR4 @ 2933MHz
Storage: 64GB eMMC v5.1
Expansion Slots:
1x M.2 M Key (PCIe 3.0 x2, NVMe SSD)
1x M.2 B Key (PCIe 3.0 x1, USB 2.0/3.0, SATA, SIM – supports 4G/5G modules)
Connectivity:
Wi-Fi 6 (2.4GHz & 5GHz, 160MHz)
Bluetooth 5.2
Intel Gigabit Ethernet
USB Ports:
2x USB 3.2 Gen1 Type-A
1x USB 3.2 Gen2 Type-A
1x USB Type-C (PD, DP, USB 2.0)
1x USB 2.0 Pin Header
Display Outputs:
HDMI 2.0b (up to 4096×2160 @ 60Hz, HDR)
DisplayPort 1.4 (up to 4096×2160 @ 60Hz, HDR)
eDP (touch display support up to 1920×1080)
Security: TPM 2.0 onboard
Co-Processor: ATMEGA32U4 (Arduino Leonardo)
Audio: Combo jack (mic/headphone)
GPIO and Other Interfaces:
12x analog inputs
Up to 23x digital I/O (7 PWM)
UART, I2C, SPI, audio header
RS232 (4-pin), Fan header, power/switch header
Supported OS: Windows 10, Windows 11, Linux
Dimensions: 125 x 78 x 16 mm
Operating Temp: 0°C to 75°C


The main reason behind choosing the LattePanda 3 Delta for this project is its powerhouse specs. It’s a fantastic alternative to low-powered netbooks or entry-level desktops using Intel i3 chips. Whether you’re planning to run emulators, browse the web using Chrome, or multitask with various lightweight applications, this board handles it smoothly.
While the Raspberry Pi may fall short in these areas, the LattePanda easily steps up to the challenge.
Special thanks to DFRobot for sponsoring this project by providing the LattePanda 3 Delta. Be sure to check out their store if you’re considering one for yourself!
Basic Setup
Main Model Breakdown
The complete build comprises 13 individually printed components: the base body, middle body, rear lid, funnel, handle, three internal support pillars, four holders for the middle section, a custom logo, a decorative floppy disk piece, a second funnel (for airflow), an adapter holder, and a small part known as the “lid of the lid.”
Base Body: This part serves as the foundation of the build. It houses the display panel, the custom logo, and the ornamental floppy disk module.
Middle Body: This section accommodates the speaker system, the LattePanda board, and three internal supporting pillars for structural integrity.
To optimize print efficiency, the middle section has been split into two halves. This change reduces the printing duration significantly—from around 19 hours down to 10 hours—by utilizing a 1mm nozzle.
Back Lid: This enclosure includes a DC cooling fan paired with a funnel for airflow management. It also holds the adapter for the LattePanda board. A smaller hinged component, the “lid of the lid,” is integrated into the back panel and can be opened for easy inspection or access to the internals.
3D Printing the Body
Each model component is exported individually as a mesh file and imported into a slicing application for printing.
I used Cura as the slicing tool, and these are the print settings I followed:
Nozzle Size: 1mm
Layer Height: 0.32mm
Infill Pattern: Cubic at 50% density
Cooling Fan: Set to 20% speed
Material: PLA
Parts to Print:
Base body
Middle body (split into 2 parts)
Back lid
Funnel (x2)
Handle
Internal support pillars (2 of type 1, 1 of type 2)
Middle body holders (x4)
Logo (printed in orange PLA)
Decorative floppy disk (printed in orange PLA)
Adapter holder
Lid of the lid (printed in orange PLA)
Front Lid Assembly
The first step in assembly is putting together the front lid section.
Display Installation: A 7-inch LCD display is mounted onto the front cover using hot glue. Adhesive is applied at each corner to secure the screen firmly in place.
Power Button: A small tactile switch is installed, serving as the main power button to control the LattePanda.
Front Detailing: The “LATTEintosh” nameplate and the floppy disk cover are affixed to the front panel using super glue for a clean, finished look.
Middle Body Assembly
Due to its original large size, the middle body was divided into two parts for more manageable and quicker printing. The total print time dropped from around 20 hours to under 10 hours per piece.
To rejoin the halves:
Four rectangular holders are used to align and secure the pieces.
Two holders are first attached on one side using four M2 screws each.
After securely joining the halves, a handle is mounted onto the middle body with two M3 screws.
Merging the Front and Middle Sections
Once both parts are assembled, the middle body is aligned and placed on top of the front lid. They are connected firmly using M3 screws.
Speaker Installation
For sound output:
Two 4-ohm speakers are prepared by soldering connecting wires.
These wires are then connected to a CON4 header pin.
The speakers are placed into pre-designed mounts on the middle body, which includes built-in grills and holes for securing the components—already accounted for during the CAD modeling phase.
Result So Far
Continuing the Build
By this point, the front and middle sections of the case have been successfully assembled, giving us the core frame of the computer. We’ve already installed the display in the front panel and speakers into the middle body.
To power the display, its VCC and GND lines are connected directly to the 5V and GND terminals on the LattePanda board.
If you’ve made it this far—awesome work!
Lid Assembly
The next phase is assembling the rear lid.
Installing the DC Fan:
Begin by mounting the DC cooling fan and its accompanying air funnel to the rear lid using four long M3 screws. This will manage airflow and keep the system cool during use.Power Brick Mounting:
The LattePanda’s power supply brick is secured into its designated space using an adapter holder. It’s fixed in place using two M2 screws to ensure it stays put during operation.Lid Cover Attachment:
A smaller hinged cover—referred to as the “lid of the lid”—is attached using a single M2 screw. Two square magnets help keep this cover securely in place while still allowing it to rotate open, making it easy to peek inside the unit when needed.
Adding a Barrel Jack for the DC Fan
Next, a barrel-type DC input jack is installed on the middle body. This jack allows you to connect a 12V power adapter dedicated to the fan.
The fan’s VCC and GND wires are soldered to the corresponding terminals on the barrel jack.
Once wired, connect a 12V adapter to test if the fan activates—this confirms that the cooling setup is functioning as intended.
Mounting the LattePanda Board
Now it’s time to install the main control board.
Begin by attaching the plastic standoffs (which come with the LattePanda) to their mounting positions inside the middle body.
Carefully place the board onto the standoffs and secure it using four M3 screws to ensure it stays firmly in place.
Installing Internal Support Pillars
To reinforce the structural integrity of the build, internal support mounts are added.
First, a horizontal support bracket is placed near the speaker area.
After that, two vertical support mounts are installed along the walls of the middle section.
These pillars are crucial for preventing bending or compression, making the entire unit more rugged and durable.
Wiring Everything Together
With all major components mounted, it’s time to connect the wiring:
Attach the HDMI cable to the display port on the LattePanda.
Connect the display’s power leads (VCC and GND) to the 5V and GND outputs of the board.
Hook up the positive and negative terminals of both speakers to the audio output on the LattePanda.
Finally, plug the tactile switch’s wire harness into the SW (switch) port on the board.
Final Assembly
To bring everything together:
First, connect the USB Type-C cable to the LattePanda’s power input.
Then carefully align and attach the lid section to the middle body.
Secure the lid with six M2 screws—three on each side—to lock everything in place.
With this final step, your PC build is officially complete and ready to boot up for the first time!
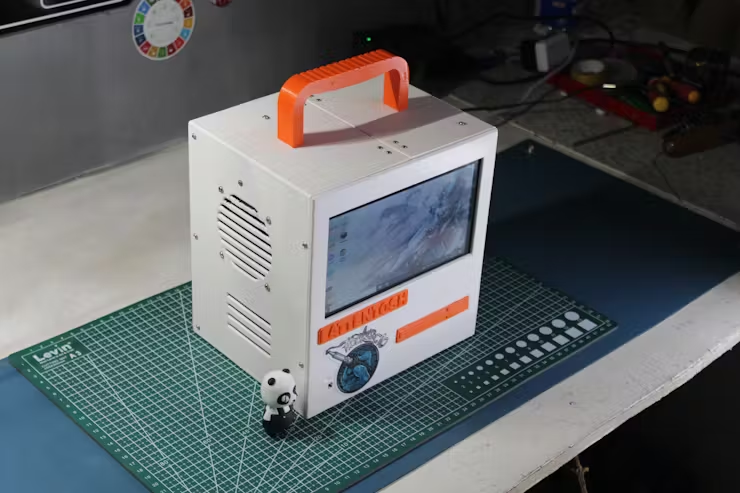
Final Result
After all the effort, here’s the outcome: a compact PC that closely resembles the classic Macintosh 128K in terms of form factor, yet it runs Windows 10 and handles a wide variety of tasks. From video editing and Photoshop to running low-spec games, emulators, and most importantly, browsing YouTube on Google Chrome, this little system can do it all!
Connecting the Keyboard and Mouse
For input/output, I’m using the three available USB 3.0 ports to connect a keyboard and mouse. Currently, I’m using a Dell keyboard and an HP standard mouse. However, my plan is to upgrade to a Bluetooth keyboard and mouse, which will both connect via a single Bluetooth dongle.
The system is powered using the supplied power cord, which connects to the LattePanda’s adapter and powers the entire setup.
Running Games
This machine handles retro gaming like a pro, as it doesn’t require a dedicated graphics card. I tested it with the PPSSPP emulator, running Dragon Ball Z: Shin Budokai, a PSP title from 2006, and it worked flawlessly. I also tried playing OSU, and that ran fine too.
Although I haven’t stress-tested it with more demanding titles yet, I plan to add an SSD for better performance and will test it further by running CSGO through Steam.
And yes, as a fun fact—YES, it can run Doom!
Watching Videos and Anime
One of the main uses for this PC is to watch movies, shows, and anime. Despite the 7-inch display not being extremely bright, it still handles video playback smoothly. It provides a decent experience for watching content, which is great for a compact system like this.
Web Browsing
For web browsing, I tested Google Chrome and Microsoft Edge. The system handled multiple tabs without any lag, showing that it can manage everyday tasks like browsing with ease.